Wednesday, October 1, 2008

Packing in more activities!


#1 & #2 have begun their scouting career this past week! They are quite enthusiastic! I read through the manuals last night... a lot of parent involvement. Also a lot of building/making things! Great opportunity for blog fodder here! so- stay posted!

Tuesday, September 30, 2008

Farming and Felting

This past weekend was National Alpaca Farm Days and CT DOAG's "Tour de Farms" (too bad it rained!). One of the participating farms is just a half mile or so from my parents' house, so Mom and I took the boys on Saturday.

They got to meet sheep, alpaca, a llama and a goat and the woman who raises them. They asked a lot of GREAT questions! they asked about what they ate, where they slept, how they were sheared and did it hurt (it doesnt - they look forward to it. wool gets hot in the spring!). Perhaps the best question was from Ryan. He asked her why there were thermometers all over the barn. I didnt even notice them! She explained where the animals come from (mountains!) and that their coats keep them very warm - especialy in the summer - so she has to make sure that the animals are cool enough and if it gets too warm, she gives them baths - even 2 or 3 a day. ALso, in the winter, she needs to make sure they are warm too.

Since I was chasing an over-stimulated toddler, I didn't get any pictures..
I picked up a needle felting kit for the boys and I to do together. They picked out a ghost kit. I made one to figure out how it worked then showed them.

That is Ryan felting his ghost. Mine is the one on the left in the last picture. Andy's is on the right.

They had SUCH a blast that I may have to get more roving and let them make some Christmas ornaments for gifts. I can show them how to thread a needle and sew on a hanging loop - maybe even some beads! (ooh and they can caount that towrd their Cub Scout Electives!)
SAFETY NOTE: This is a really fun activity, BUT it is for older, school-aged, kids with a LOT of supervision! The felting needle is sharp and it is barbed. Proceede with EXTREME caution!

Monday, September 8, 2008

Camp from a kids perspective (cross post)

I gave Andy and Ryan each a disposable camera (yeah.. the kind with film. now you know why this post took so long!)


The highlights from Andy's perspective (I'll spare you t he dining hall, the rock and the puddle!)

our Cabin:


at the beach:


From Ryan's Perspective:
self portraint:


Andy from the treetops:


Look closely, there are people swining on ropes in those trees!


I took these of the boys on the low ropes course.

Photobucket
Photobucket Photobucket Photobucket


What did I do at Camp? Well, I found a few minutes to knit here and there and started some longies for Colin. I'm calling them the "HiRock Longies" (Ravelink here ) because the colors reminded me of the trees. see (wooden tree painted by Ryan at Arts & Crafts):

Wednesday, September 3, 2008

Back to School!


It's that time again! I'll be keeping posted with any cool craft ideas we come up with - think holiday gifts! and keep an eye on the sidebar - some great ideas in those blogs!

Friday, August 15, 2008

So HOT it's on Fire!


For several weeks, I've been following the Unplugged Project (also in my sidebar). Last week's theme of hot fell right in line with a project I had planned for this week's "ready for camp" theme.

A big part of camping is the campfire. How can you tell stories, sing songs or make s'mores without a campfire? We need fire-starters to get the fire going - especially if it rains (yes, for those of you who never participated in scouting, it is possible!)

In the past I have rolled up strips of newspaper, tied them with a wick and dipped them in wax. I've also tied the wick on a pine cone and dipped those as well. BUT I'd rather not have my kids dipping things in hot wax-even if it does fit the theme...

I came up with a much more kid-friendly version.

Materials:
  • paper egg carton with the top removed

  • dryer lint (optional)

  • braided wick (be sure this is NON metallic).

  • hot glue gun

  • microwavable soy wax melts

Instructions:

  • cut the wick into pieces about 2" long.

  • put a drop of hot glue in the center of each egg cup and place the end of the a wick in it (use a toothpick or pencil to push it in).

  • place a pinch of the lint in each cup. the wicks do not need to stay centered, but make sure the end is exposed so it can be lit at camp.

  • top of each cup with plenty of wax. Remember that the paper and lint will soak up the wax, so be generous.

  • place the whole thing in the microwave in High for 30 second intervals until all the wax is melted.

  • allow to cool.

  • once cooled, the fire-starters can be broken apart or kept together.

  • when you are ready to build your fire, add one or two with the kindling and light the wick.

Warnings:

  • the wax is hot when it comes out of the microwave and should only be handled by adults.

  • use this opportunity to remind the kids about fire safety.

  • when camping or buildings any fire, check all local regulations first and only light fires in approved places. NEVER light a campfire during a red flag warning.

  • ALWAYS be sure that your fire is out COMPLETELY before leaving it unattended.

Notes:

  • I'm not sure the wick is really necessary, or if the carton will light sufficiently on its own. I'll report back once I've tested them.

  • marshmallow Peeps are REALLY good when toasted on the campfire...

  • these are safe for use in your fireplace as well (assuming that your fireplace is in good working condition to begin with).
update- they work GREAT! no need for the wick either. the carton tended to ignite before the wick did anyway.

Thursday, August 14, 2008

Color Explosion

In the pre-vacation chaos that is my life this week, I opted for another easy peasy project. Ryan has been BEGGING me to get them "Color Explosion" paper & markers since we got a sample in some other Crayola product. I found them for $5 when I was out picking up stuff for our camping trip.

I guess it went over well, because Daddy sent me a text saying we need to buy more and all of the paper was used up when I got home (20 sheets/kid!).

(pictures comming)

Tuesday, August 12, 2008

Reading in the Wild


Spotted in the wild.. OK .. the kitchen. My eldest two involved in spontaneous cooperative reading! They both read to their "baby" brother (he'll be 2 in a matter of days!!!) but for the two of them to share a book like this... to share anything for that matter! Makes a mama proud!

Monday, August 11, 2008

solid+liquid=gas


we did a little non-toxic chemistry experiment. One that I do frequently when I clean, actually. the boys mixed baking soda and vinegar to see what would happen. while this is non-toxic, It can be messy, so we went outside in case of "explosion".


Instructions:


  • Using a funnel, put 1 Tbsp. baking soda in a latex balloon.

  • again using the funnel, pour 1C. white vinegar into a clean 20oz soda bottle.

  • place the opening of the balloon over the neck of the bottle while keeping the balloon itself to the side - keeping the baking soda in.

  • have your child keep one hand on the neck of the bottle and lift the balloon up with the other.

  • watch as the solid dissolves in the liquid and the reaction makes a gas that bubbles, fizzes and blows up the balloon!

Thursday, August 7, 2008

Disaster Ressurected


Last week, the boys attended the third week of Karate Camp. Camp is mornings only and they were missing their craft time with Dad. SO, I left their projects in my bedroom for Daddy to distribute AFTER Karate camp.
Well, #1 got up early one morning, went into my room and saw his painting kit and decided to help himself... He proceeded to break the tube of BLACK paint and get it on himself, the kitchen table, chairs, floor and 2 of my good bath towels.
Daddy cancelled all of our painting plans until further notice.
Once Dad regained composure, a few days later, they had another go at the painting. This is our camp painting area in the back yard. The table is a cheap ($10-ish) plastic one we've had for several years. It is also broken. So, they can get some sun and fresh air while keeping painting messes out of the house. Sesame Street plates and Halloween cups sold separately! The plates made great palettes and the paints peeled right off when dry!
I'll post better pictures of the finished pieces, but they are essentially coloring book pages printed on canvas. Each one came with a brush and a set of acrylics. Not bad for $2 (Christmas Tree Shop).

Wednesday, August 6, 2008

Up, Up and Away!


Yesterday, the boys learned about flight. I got a little book of papaer airplane paper - complete with folding instructions and cool stickers. Found that at the craft store too.. ($2 for 6 planes). This can certainly be done with whatever paper you have around - even recycle newspaper, magazines or junk mail! Experiment with different folds, and don't forget to decorate your planes! Daddy showed them how different folds made the planes do different things.

Tuesday, August 5, 2008

Recycled Crayons


I've seen this idea lots of places. take old broken crayons, peel the paper off and break them up even more. Put the broken pieces in a small tart or muffin tin. Bake at 200 F until melted. remove and allow to cool before removing your new rainbow crayons!


Hints:


  • freeze the crayons before breaking them up

  • use a silicone pan or grease the tin VERY well. DO NOT use a porous pan such as stone or cast iron

  • if you have a pan that fits in your toaster oven, it is easier to watch the wax melt.

  • Freeze the warm crayons to set them faster.

Edited to add- Check out these alphabet crayons! more tips in there on how to make great recycled crayons!

Wednesday, July 30, 2008

Recycled Catepillars


I cut the top off an egg carton, then cut the bottom in half lengthwise. The kids had paints, pipe cleaners and googly eyes. Add in a LOT of creativity... and you have two very hungry (adn cute!) catepillars!
It was very simple and it let the kids use their imaginations. A great opportunity to talk about bugs and the life-cycle of a catepillar.

Tuesday, July 29, 2008

One for the Birds

This week's theme: Explorers

Since spring began, #2 has been insistant upon making a birdhouse at Daddy Day Camp. Sounds great, but Daddy isn't exaclty a handyman and with 2 big boys and a toddler, that really isn't feasible.

So....


I picked up a couple of unfinished ones at the craft store. They painted them. I'll spray with a clear sealer, add hangers and let them pick a spot in the yard.

Our yard is loaded with birds! We're borrowing a birdwatching book form the library to help us Explore our yard for different birds (and bats! we've got a bat house too).

Monday, July 28, 2008

Back to Business

The boys really enjoyed their two weeks of Karate Camp, but Daddy was getting a bit burnt out trying to get everyone out of the house and to camp on time, so we are back to the business of Daddy Day Camp.

We noticed something interesting the last couple of weeks - well, actually, I didn't figure it out until last Thursday. Building up to then, we've noticed the kids fighting more with each other, constantly being negative, beligerent and complaining of boredom. One would think this attitude would have improved with the addition of camp.

It dawned on me Thursday night that we'v ebeen all business inhtis house. Get dressed. eat your breakfast. go to camp. The conversations between parent and chid have been all business. No wonder why we were all so cranky!

Since Friday, we've made a deliberate effort to talk with them and do things with them. Not that we have given control over to them, but we are reminding them that we aren't Ogres and we can be fun too! the change in their behavior was immediate!

Friday, July 18, 2008

off the hook...

I initially planned on Math games/activities for next week. I came up with nothing... I was "saved by the bell" just now. The owner of the Martial Arts school decided to add another week to Karate Camp! They've had a great week, so they are looking forward to another!

As for the math, I am working it into the daily activities:
  • asking them to cut and or divide things
  • count the towels I am folding
  • tell the time
  • #2 helped count the change at the grocery store
  • #1 got to count my stitches as the doctor took them out
  • measuring ingredients while we cook

I am also going to try to work math into the rest of the Daddy Day camp activities.

Monday, July 14, 2008

Karate Camp!

This week, the b0ys will spend their mornings with their karate instructors. They will be doing plenty of karate, but they will also play other games/sports and work on sportsmanship. Each participant will get a trophy at the end of the week. I'll have to make room on the mantle next to their other 6 trophies from the tournament! I hear it was a rough morning getting them going, but I know they'll LOVE it!

It gives me a break to plan for next week too. Math week doesnt' sound too exciting, but I'm hoping they do'nt notice that they are learning math... maybe we'll start with ractios? They both get the concept of multiplication, so it may be a good time to introduce division (and that is all that fractions are).

Friday, July 11, 2008

Fossils


I used this recipe for "Coffee Ground Fossils" (great site - annoying pop-up). I mixed the dough the night before and made individual balls, wrapped them in plastic wrap and squashed them flat. When I mixed the dough, I found it to be more batter-like than desirable, so I added another 1/2c. salt and 1c. flour. It was still soft and sticky the next day. they left it out for a few hours to stiffen up and managed some fossils. I had to move them off of the kitchen table for dinner, and they lost some definition... so I'm not sure I'm 100% thrilled with the recipe. I think I may have gone wrong with the coffee grounds. we are NOT coffee drinkers, so my ILs put some in a Ziploc for us. They were still damp, but not dripping when I added them. perhaps they should have been dry.. the boys enjoyed this, so it may be worth a do-over. I also had to let them dry for 3 days and they still aren't totally dry. Perhaps "baking" in the sun would have helped.... or better yet... in the oven.
*This is a rare "Thomas the Tank Engine" fossil made by #1 who is having a hard time handing the trains over to #3...

Thursday, July 10, 2008

Make Your Own: Playdough


Don't want to buy playdough? Afraid that your child will eat it? Want another activity you can do together? Make your own! It is easier than you might think and you probably already have all of the ingredients in your pantry! It is completely safe and non-toxic. I'm sure it will taste pretty gross, but it is non-toxic!


Ingredients:

  • 3 cups flour

  • 3 cups water

  • 1 cup salt

  • 3 Tablespoons vegetable oil

  • 2 Tablespoon cream of tartar

  • food coloring or unsweetened powdered drink mix

  • glitter (optional - omit if you think it may get eaten)

Make the Dough:


Mix all of the ingredients together in a metal bowl or saucepan and stir over low heat. As the dough begins to thicken, it will pull away from the sides and clump in the center. When it is no longer sticky, remove the pan from heat and allow the dough to cool enough to handle.


Turn the dough out onto a clean counter or silicone pastry mat, and knead until it becomes smooth. Divide the dough into balls for coloring. Poke a hole in the center of the ball, and drop some food coloring and glitter in. Fold the dough over, working the color and glitter through the ball of dough (you might want to wear plastic gloves for this part). Start with a small amount of color and add more until you get the shade you want.


Tips:

  • Concentrated paste dyes used in cake decorating will give you nice deep, vibrant colors. I used Wilton dyes for the dough shown.

  • Unsweetened powdered drink mix will make your dough scented as well! you may need to go heavy on the mix to get rich color.

Wednesday, July 9, 2008

Field Trip #2

Yesterday's project is still drying, so more on that tomorrow when I can give a full review.

Today is another trip to Grandma's. Daddy and Papa are going fishing, so the boys are spending the day running in the sprinkler in my In-Laws yard. Hopefully, the thunderstorms will hold off...

Tuesday, July 8, 2008

Dyno-mite!


To kick off Paleontology week, the boys decorated these wooden dinosaurs. the kit included 8 wooden Dino's, stands, markers and paints for about $8 (I got it on sale for $4). We've been reading a bit about dinosaurs the last few weeks. #2 and I just finished Dinosaurs Before Dark from the Magic Tree House series. Meanwhile, I was reading Andrew Lost With the Dionosaurs from the Andrew Lost series with #1. they enjoyed getting hands on witht the critters that they have been reading about.

Monday, July 7, 2008

Firecracker!!!


To help celebrate the 4th, the boys made their very own fireworks! I took a toilet paper tube, filled it with glitter stars and taped both ends. Half of a pipe cleaner makes a great fuse! then, they got to decorate them. On the 4th, they cracked them open (outside!) like mini-pinatas!

My apologies on the lack of photos. I was in an accident last week and I am still playing catch-up.

Friday, July 4, 2008

Happy Birthday America!

We moved play dough day to Thrusday due to the Holiday, but tune in Monday for my dough recipe!

Until then, have a safe and happy 4th!

Wednesday, July 2, 2008

Stars & Stripes


As we continue on our "Stars &Stripes" week, the boys made their version of Old Glory. I gave them each red, white and blue construction paper, scissors and glue sticks. They have crayons and markers on hand and the glitter glue was left to Daddy's discretion. You can also use stickers or stamps for the stars or paint the stripes.

Tuesday, July 1, 2008

Field Trip


Yesterday was the first "field trip" of the summer. A trip to my In-law's house. Nothing too exciting, but it is a change of scenerey and the driveway is a perfect spot for Daddy to teach #1 & #2 how to skateboard. I did pack a simple necklace kit for #1 & #2 to do today as well. Quick, easy and $1 at joann's. It fit this week's theme: Stars & Stripes!

Monday, June 30, 2008

Playdough Day


  • Last summer, as a treat, Fridays were Playdough days. It was such a big hit, that it has mad a return this summer. At the end of a busy week, it is a nice no-brainer for the staff here at DDC.

    I have a bin loaded up with:
    containers of playdough
  • tools
  • 2 plastic tablecloths


You can get big bags of small containers in the party sections of the discount stores. I've had great success finding deals on them at the dollar store as well.

"Tools" can include plastic utensils, cookie cutters, small plastic rolling pins... just about anything. Plastics are good because they are non-porous (easy to clean) and tough to break.

Tablecloths also came from the dollar store. one goes on the table - one under it. Better still, set them up at a table outside!

You can guide this activity as much - or as little - as you like. We prefer to let them explore and create. Aside from having fun, they are strengthening their hands and developing fine motor control, imagination and creativity. It also provides them with visual and tactile stimulation. If you prefer to guide them a bit mroe, use the dough to teach colors, shapes, letters, numbers and even words! blend colors together and explore the color wheel!

Friday, June 27, 2008

Mugs


Another easy kit from the craft store. I remember doing these as a kid and I loved them! It is jsut a plastic mug with an assortment of paper inserts for them to choose and color and create their own mug. You can even trace one of the pieces of paper and make your own insert out of other papers - or even fabric! Just because it comes in a box doesn't mean you can't think outside the box...
#1 opted for crayons and #2 went with watercolors. #3 tried to eat his crayons.

Thursday, June 26, 2008

Bookmarks


For this, I kind of "cheated" to keep it simple. I picked up blank foam bookmarks. 10 for $1 I think. I also threw in a bunch of stickers we have acquired over the years, some markers, yarn scraps and glitter glue (in case dad was feeling brave). We'll just let then have at it and decorate them! Another boost to the summer reading push. They have already managed to find their way into several books!

Wednesday, June 25, 2008

Summer Journal


My kids all love to write, color and draw. Unfortunately, they have the penmanship of a Doctor (which works well since #1 is going to be a Dr. - ask him - he'll tell you). In school, #1 wrote in a reading journal daily. #2 practiced writing every day as well. #2's teacher even sent him home for the summer with a notebook to practice writing in.

I wanted to keep up the writing practice, but not feel like an assignment. So, they started off the summer by decorating their own summer journals.

Materials:


  • single subject notebook, composition or theme pad

  • stick on foam sheets

  • letter stickers

  • decorative stickers

  • scissors

  • markers

Directions:

  • trace the cover of the notebook/pad on to the backing of the foam.

  • cut foam on the lines

  • remove backing and stick to the cover of your notebook

  • Add the name and/or title in letter stickers

  • decorate with more stickers

  • use markers to complete personalization

How to use: Encourage your child(ren) to use their journal dialy. Record the events of the summer or imagine new stories. This is not intended as grammar exercise and it isnt' going to be graded. Let them use thier imaginations, practice penmanship/fine motor skills and develop story telling skills.


For younger kids: a parent can trace and cut the cover and maybe even stick that on as well. This is intended for school-aged kids, but even toddlers aren't too young to start drawing and coloring. not only is it great for their imagination, but it helps develop pincer grasp and hand-eye coordiantion.


Tuesday, June 24, 2008

Camp Rules

We have our house rules posted on the same wall as our family calender and important notices. They know the rules and they know the consequences. (We like Super Nanny!)

We also have a Toddler, 2 boys with ADD/ADHD and a Dad in charge who also has ADD. I can not overstate how important structure is in our house. It is crucial to survival.

I found a couple of tips on Let's Explore (my new favorite blog!). The first is a "Chore Bucket". The kids pull a chore out of the bucket and that is the chore for the day. They are all things that they can do and can feel good about doing a good job. #2 in particular LOVES to be a helper. #1 would rather sit in front of the TV... I'm thinking Dad should pull out a chore to set a good example ;).

Another cool tip I found on Let's Explore is the Marble Jar. you set out a basket of marbles and an empty jar. When they do something worthy of praise, they got to add marbles to the jar. Once the jar is full, they get a special treat. We tried giving them each a jar of pennies and taking away pennies when they misbehaved, but they threw a fit at losing pennies and I think it focused too much on the bad behavior. I think the marble jar will not only get them more praise, but it will encourage them to work together.

We started the Marble Jar last night and it was met with great enthusiasm. #1 & #2 got the jar going by doing such a great job reading while I got #3 ready for bed. We have not even decided what the "surprise" will be yet. I try to keep rewards to non-material things, but I'm thinking maybe a book from the book store... or better yet a trip to the Public Library! To avoid starting too much at once, we're holding off on the Chore Bucket until the weekend. Daddy and I will be picking chores too. Chores done with effort and enthusiasm will be rewarded with marbles - even if it isn't done "right". It is the effort and the work ethic we are going for here.

I also plan out our menus every week, which not only gets dinner on the table at a reasonable hour, but it saves a lot of money in groceries. I also plan out lunches and snacks. Daddy has also requested we sit down and come up with a "Camp Schedule". This may be too rigid for some families, but again, with the abundance of ADD/ADHD in our home, it is a necessity.

Monday, June 23, 2008

Camp Starts Tomorrow!

Last day of school.. which means that tomorrow is day 1 of Daddy Day Camp. I had one request from Dad - "go easy on me the first week or so...". About a month ago, he spent a week in the hospital and about 2 more at home in bed getting his strength back. he is more or less back to himself, but pretty apprehensive about running the camp.

With that request in mind, I hit the craft stores. I was pleased to find so many kits ready to go for fun summer projects. So, yeah, some of the early projects may be cop-outs, but so be it! gives me time to get some better ideas....

Last year, I had daily themes like "Monster Monday" where the activitys all had something to do with monsters. It quickly became a stretch to get things to fit. This year, I'm thinking about weekly themes.

Week 1: Setting up Camp
Week 2: Dinosaur Days ? we'll have to see how this pans out...

Look for more "getting started" tips tomorrow. I will post the activities on a delay, so that you can see the finished product along with the instructions.

Friday, June 20, 2008

Getting Started Tips

Some of the things I learned last year:
each kid gets their own project bag/box/basket/container
  • whenever possible, put everything they need in the project bag/box/basket.
  • keep things simple and fun (and low maintainance)
  • schudule in "free" days and outings.
  • try doing activites that build on one another
  • Kids get dirty... accept it and move on...
  • check the $ stores, www.orientaltrading.com, and the "value" baskets/bins at joanns & other craft sores for ideas and simple kids.
  • Keep a bin of crayons, markers, construction paper, cardboard tubes, empty thread spools, glue sticks, kid scissors, stickers, paints, brushes, pom poms, pipe cleaners, egg cartons etc. handy.

add your tips in the comments!

Thursday, June 19, 2008

The Concept

Last summer, our oldest son (6 at the time) went to day camp for 4 weeks. He has minor speech/developmental delays resulting from PTSD and his camp was a camp for high functioning "special need" students in the school district. So, really, he needed to go. He had fun and never realized it was "therapy".

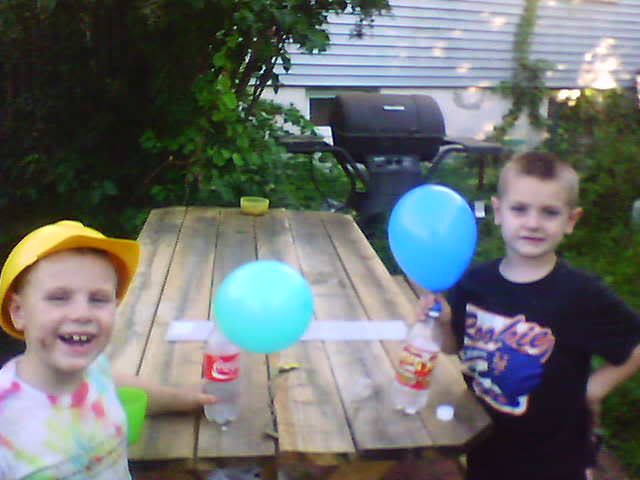
It only took a few days for our middle son (4.5 then) to get jealous. Not only was he lonely without his brother, but he was quite envious of the fun his brother had every day.

My husband, a SAHD, was at his wits end trying to entertain him and care for our almost 1yo. I was heartbroken to see the middle child so bummed.

SO

Daddy Day Camp was born! (before the movie came out!)

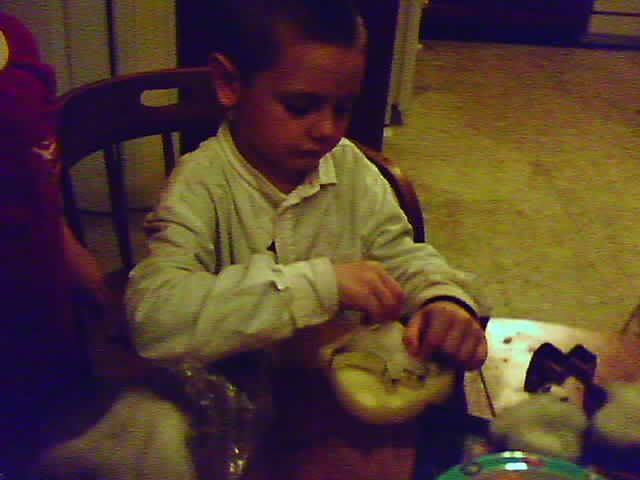
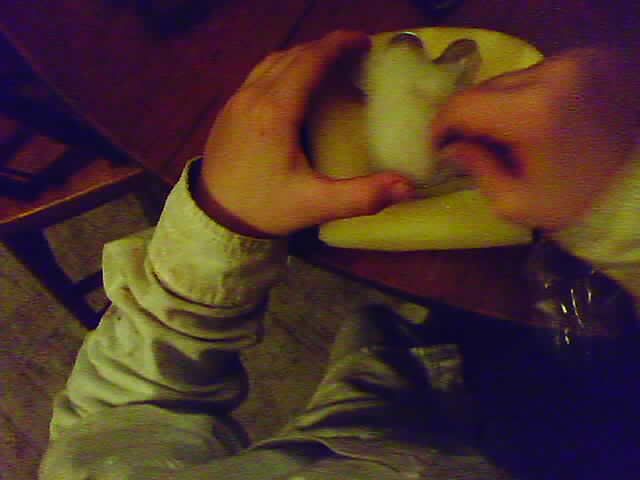
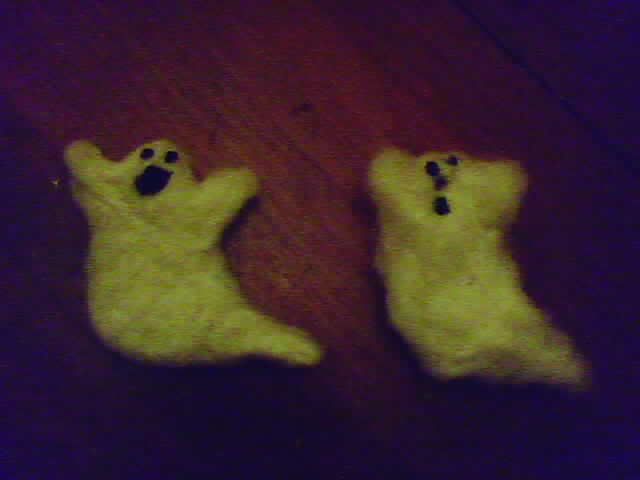
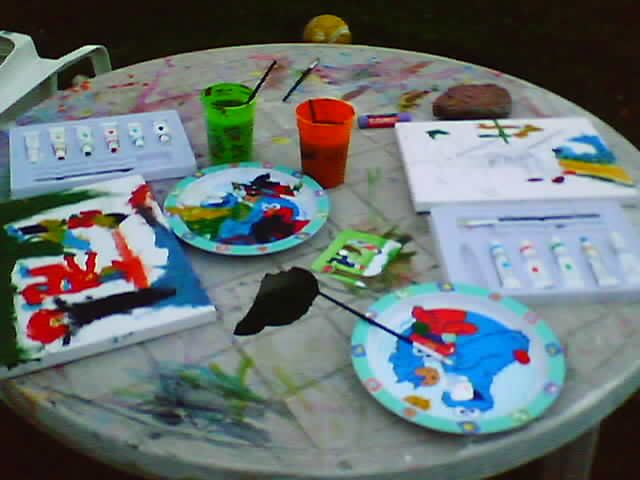
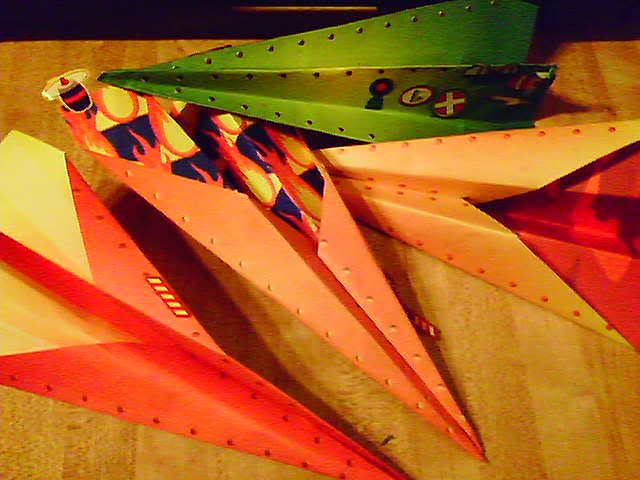
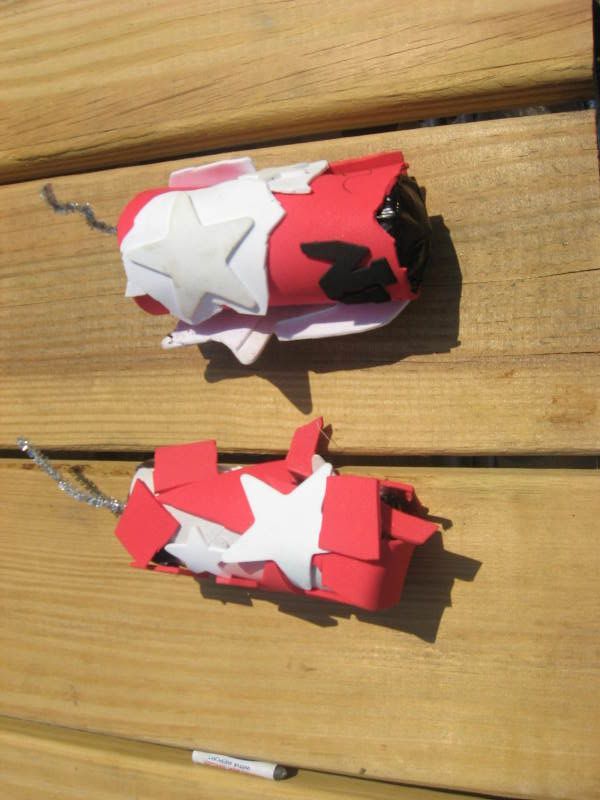
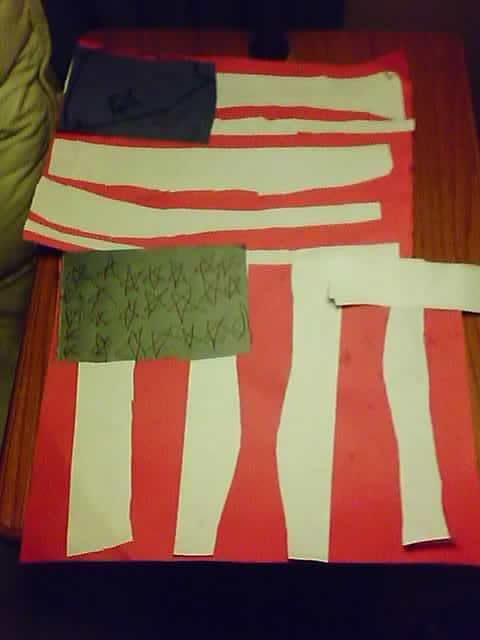
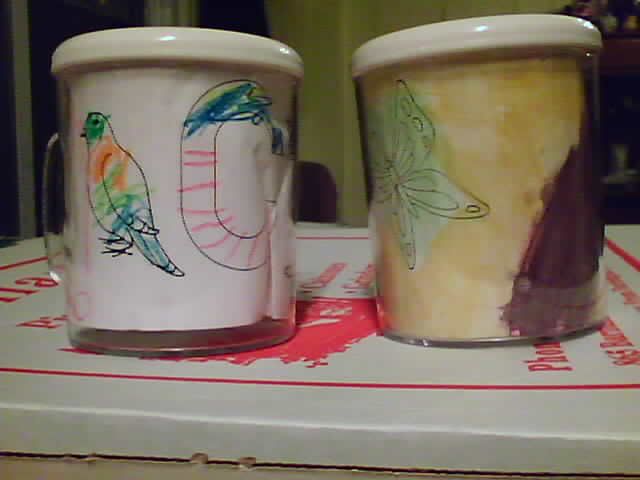
Every night after he went to bed, I put a "surprise craft"/activity and all of the materials he needed in a special bag with his name on it. He wasn't allowed to open it until after breakfast.

The activites were usually simple and on his level. I made sure they were projects that required little to no assistance from Dad. He was proud of himself for being able to complete his project on his own and it freed dad to tend to the baby - who was rather ill and extremely under weight at the time. Once my oldest was done with day camp, we enrolled him in "Daddy Day Camp" as well.

This summer adds several new dynamics:
  • #1 & #2 have both been diagnosed with ADD/ADHD.
  • #3 is healthy and strong... and likely going to want "in" on this camp thing.
  • none of the kids are enrolled in outside "camp" activities, but #1 & #2 are both in karate class 2x/week.
  • The kids are older, gifted and learning new skills that I'd like to reinforce without making it feel like school.
  • My project ideas from last year willmost likely bore them to tears.

I suppose I'm the camp's Activities Coordinator, but Daddy is certainly counselor, medic, chef, and director. So, join me us as I prepare my projects and ideas. As I gather sources and information, I'll add them to the sidebar. Feel free to comment and add your own links, ideas and suggestions.

Camp officially starts on Tuesday (6/24/08).